 Harvesting VeggiesWhen I first started growing vegetables, I was confused at harvest time because I didn’t know just when to pick my veggies. I discovered I’m not alone. For many novice gardeners, our only knowledge of what ripe fruits and vegetables look like comes from the grocery store. Yet, when we begin to grow our own produce, it rarely looks like the blemish-free, polished and waxed fruit and vegetables at the store.
Here are some tips on how to harvest three popular homegrown goodies at the peak of their ripeness and flavor. Tomatoes Nothing can compare with a homegrown tomato. After one season of growing your own, you may never want to buy a tomato in the store again. Store-bought tomatoes can often be almost tasteless because they are often picked while they’re still green, and then sprayed with ethylene gas to force artificial ripening. The picking, transporting and storage process prevents natural ripening and sugar accumulation. Tomatoes undergo a very interesting physiological change when they are about half pinkish-red and half green. At this “breaker” stage, they form a thin layer of cells that seals the fruit from the stem. This layer of cells prevents any nutrient flow from the plant to the fruit. Tomatoes can be harvested at or after the breaker stage and they will ripen normally, but they need to ripen in the sun, such as on a windowsill, for the sugars to fully develop. Tomatoes that are left on the vine continue to ripen and develop sugars because they are exposed to sunlight, not because they are gaining anything from the plant. Store freshly harvested tomatoes on the counter or in a basket, as refrigeration kills their flavor. Some tomatoes, such as green zebra, German grapefruit, and lemon boy, never turn red. So, be sure to save your seed packets or plant tags, as these will often have pictures of the ripe fruit that you can refer to when deciding if it’s time to harvest. Eggplant Generally, eggplant should be harvested when the flesh is springy, and the skin is shiny purple and tight. Test for springiness by pressing into the side with your finger. If the flesh springs back, the eggplant is ready for picking. Eggplants that are past their prime are dull and soft with wrinkled skin. When ripe, white-skinned eggplant, such as Rosa Bianca, will have skin that is glossy white with pink stripes. Melons When trying to determine a melon’s ripeness, look at the condition of the stem and skin color. Cantaloupes “slip” from the vine, leaving a scar where the stem was attached. The bottom, or end opposite the stem, will be soft and fragrant. Their straw-colored skin should be bright. A ripe honeydew may remain attached to the vine, but should also be soft on the bottom side, opposite the stem. While on the vine, watermelons will have a small, curled tendril extending from the vine opposite from where the stem is attached to the vine. This tendril will turn brown and dry out when the melon is ripe. The stem should still be green and difficult to remove from the vine. The skin touching the ground should be buttery yellow. All melons continue to ripen after they have been removed from the vine, and should be stored in the refrigerator or a cool place. This is a reprint of an article I wrote when I was the commercial horticulture program coordinator for the western area of University of Nevada Cooperative Extension. For more specific gardening and horticulture advice be sure to visit your local Cooperative Extension office.
0 Comments
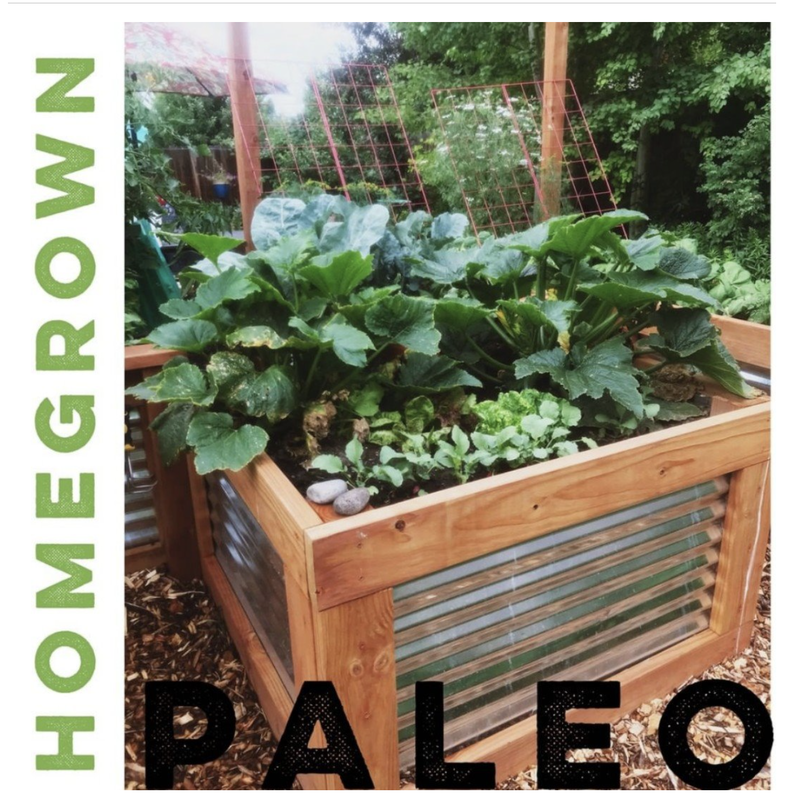
What’s vexing your veggies?You carefully prepare your vegetable garden, working in compost, starting seeds indoors, and transplanting after the last frost. Then, it never fails. Your plants drop their flowers, get strange dark spots or mysterious white splotches, or are attacked by miniscule insects. Don’t worry. You can manage these common summer vegetable problems by using “integrated pest management (IPM).” IPM is a sustainable, science-based approach to pest management that identifies and reduces the risks from pests using a variety of methods tailored to the problem. The selective use of pesticides makes IPM different from organic gardening. However, one IPM tenet is to always use the least toxic methods first. The least toxic methods are actually preventative measures. Rotating crops, buying disease-free plants, providing proper irrigation, and taking good care or your plants are the least expensive and least toxic ways to enjoy a healthy garden. Your local Cooperative Extension has a lot of good, research-based information to help you choose and grow healthy veggies. Once your garden is planted and growing, IPM requires that you determine your tolerance threshold for pests and problems in your garden. In other words, can you live with the loss of two tomato plants, but draw the line at losing three? Can you live with a few squash bugs but think a dozen is unacceptable? These are the types of questions we often ask folks who come to our office for answers to their gardening problems. Monitoring and identification is the key to successful IPM. I enjoy taking my morning cup of coffee out to my garden, and walking around to see what’s happening. I am always surprised at how much I learn from quietly observing my plants. I’m delighted to see a new bud here or a beneficial insect there. Once you become familiar with your garden, you will quickly notice when things are off kilter. Many clients come to us lamenting that their plants died suddenly or overnight. However, this is rarely the case. Most plants exhibit several signs or symptoms well before their demise, but we fail to notice them. Regularly observing your plants will enable you to spot potential problems as they arise. Catching problems at the onset allows us to use the least toxic (and often least expensive) method of control. If you see an insect, or condition you don’t recognize, such as a curled or mottled leaf, you can collect it and bring it to your local Extension office. They will identify it and recommend control methods. Often people spray a variety of chemicals to control a problem, only to discover that the problem is easily managed by simply spraying water. Properly identifying your problems will save you time and money, and help protect the health of your family and our environment. Only after you have identified a problem is it time to consider which IPM control methods to use. IPM control methods can be physical, cultural, biological or chemical. The most effective IPM programs use a combination of these techniques to control problems. Physical control Physical controls include hand picking, fencing out, pruning, or any other technique that physically prevents a pest from taking up residence on your plants. Cultural control Cultural control is essentially growing and cultivating the plant according to its specific needs, modifying the habitat as necessary. Often, these needs are detailed on seed packets or plant tags, in catalogs, or in reference books. Your local Cooperative Extension also has information on proper cultural care for growing many vegetables. Biological control Biological control is using a living organism to control your problem by eating it or damaging it. Beneficial insects, such as lady bird beetles, praying mantises, or green lacewings, are introduced to prey on the nonbeneficial insects. The eggs or larval forms of the predacious insects are commonly sold in nurseries and garden centers. Chemical control The final method of control is using chemicals. The precise and careful use of pesticides sometimes may be the only way to control a problem, especially if the problem has already gotten out of hand. So, how can you use IPM to solve some common summer veggie vexations? Here are a few common problems and ways you can solve them using IPM. These problems are often brought on by high temperatures, low humidity, or wide temperature fluctuations – conditions we often experience in southwest Montana during August. Blossom drop Every summer people are mystified because their tomatoes have dropped all of their blossoms. This problem occurs when the temperature drops below 55 F at night, or rises above 90 F during the day. However, uneven watering, low humidity, unusually heavy fruit set, or nitrogen irregularities can also cause blossoms to drop. While you can’t do much to change the weather, there are some steps you can take to help your plants hang on to those blossoms. To increase nighttime temperatures, you can cover your tomatoes with a lightweight floating row cover at night, or use “walls of water” to insulate around each plant. These are easy to use and available at local nurseries. Most importantly, make sure you water regularly, thin fruit, and apply an organic mulch to regulate soil temperature and fertility. Spider mites Spider mites thrive in the hottest days of summer. They will turn your veggie plants into a dry crispy mess if you don’t control them. Since spider mites like it hot and dry, control them by altering their environment to make it cool and humid. Increase the humidity and lower surrounding temperatures by hosing or misting plants during the heat of the day. Powdery mildew If your vegetables are covered with a strange white or grey residue, you may have powdery mildew. Powdery mildew is a fungus that prefers hot, dry conditions. This is confusing to many people since we tend to associate “mildew” with warm, humid conditions. To control powdery mildew, remove the affected plant parts, increase air circulation by thinning and selective pruning, and increase the humidity by misting your plants. Regular watering and keeping the soil moist will also help reduce the infection. As you develop your IPM program, you will discover that many of your veggie vexations are easily solved with good horticultural practices, a little common sense, and getting to know the cycles and rhythms of your garden. This is a reprint of an article I wrote when I was the commercial horticulture program coordinator for the western area of University of Nevada Cooperative Extension. For more specific gardening and horticulture advice be sure to visit your local Cooperative Extension office. 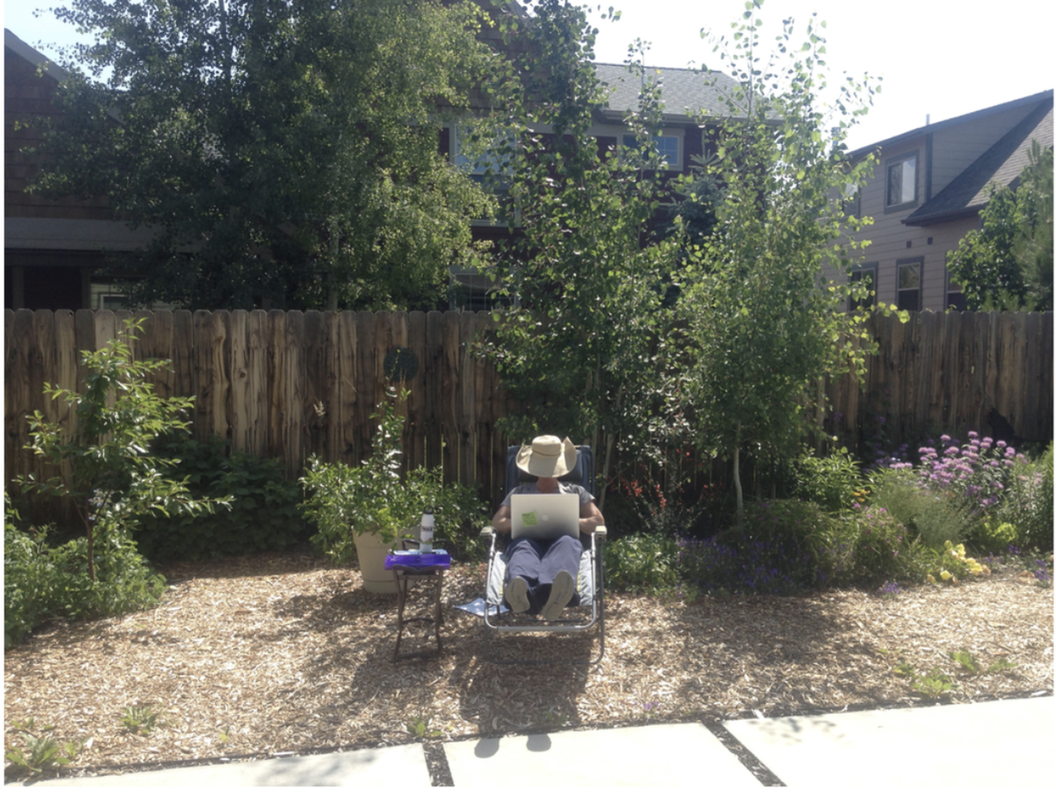 The #bosslady "works" in her backyard that she and the #bossman converted into a low-water use landscape via sheet-mulching. Water Wise Landscaping: How to convert your turf into a low-water-use landscape.Last summer the City of Bozeman declared a Stage 2 drought. A stage 2 drought requires mandatory outdoor watering restrictions. Just this past May, the Bozeman City Commission adopted mandatory permanent time of day and day of week outdoor watering restrictions for the use of overhead spray irrigation. I did not have to adjust my irrigation because I do not have a lawn. This is the third house I've lived in where I have completely eliminated all turf and replaced it with drought tolerant and water-wise plants. In fact, the City if Bozeman has reimbursed me for some of the water conservation projects I've implemented. You can benefit from these programs, too. I am not alone, the number of people interested in reducing or eliminating their lawns is steadily increasing. Concerns about availability of water and water costs have many people wanting to convert their lawns into low- water-use landscapes, without it costing them an arm and a leg. The first, and often most daunting, task is to get rid of the established lawn. The three most common ways to eliminate turf are to kill it with herbicides, remove it with a sod-cutter, or cover it with sheet mulch. There are pros and cons to each method, but sheet mulching is gaining in popularity recently. Let’s look at each method. Using herbicides Use of a nonselective herbicide, such as glyphosate, will kill the lawn and all of the weeds. This method can be satisfying for those who want to quickly kill their lawns. However, herbicides will also damage or kill any trees and shrubs planted in the turf. And, using herbicides introduces an appreciable amount of toxic chemicals into the environment. If you choose to use this method to kill your lawn, make sure to closely follow all of the instructions on the herbicide label, use protective clothing and equipment, and apply the chemicals carefully, so they don’t drift into adjacent landscapes or bodies of water. And, although it is often human nature to think that if a little is good, more is better, this is not the case when applying herbicides. Overapplication and misuse of these chemicals compromise the health of people, plants and the environment. After killing the turf with herbicides, it needs to be pulled up, removed and disposed of before the area can be relandscaped. Using herbicides to kill turf can be expensive, because you need to purchase the herbicides and appropriate protective equipment. It is also labor-intensive because the dead lawn needs to be physically pulled up and removed. Still, it is one available option, particularly for those who want to get rid of their lawn quickly. Using a sod-cutter A less toxic and potentially less expensive method for removing turf is using a sod-cutter. A sod-cutter is a machine with a horizontal cutting blade that slices through the turf-soil interface at a specific depth. Sod-cutters can be rented by the hour at most equipment rental companies. Using a sod-cutter is also a quick removal method, and it does not require the use of chemicals. But, the machines can be difficult to push. And, a sod-cutter will cut all roots it encounters, so the feeder roots of any trees or shrubs growing in the lawn will also be cut. This will seriously hinder the ability of the trees and shrubs to absorb water, and they may perish. I went to a turf-conversion seminar in Las Vegas, where an alarmingly high number of valuable shade trees were lost from sod-cutter damage. It is best to avoid using sod-cutters to remove lawns if trees or shrubs are present. When a sod-cutter is used to dislodge established turf, the turf still must be removed and disposed of. Another disadvantage of using a sod-cutter is that once the sod removed, the grade of the soil is lower. Alteration of the grade affects the way water runs over a landscape, and if not professionally corrected, can create serious problems. The lowered area will need to be filled with top soil and regraded. This could be expensive and labor-intensive, and you run the risk of importing poor-quality top soil into your landscape. Some people have imported top sol into their landscapes, and subsequently have had to battle noxious and nuisance weeds because the top soil was not free of weed seeds. So, make sure to get top soil from a reputable source, and make sure that it is certified weed-free. Sheet mulching A simple, inexpensive and nontoxic way to kill your lawn is to sheet mulch it. Sheet mulching kills weeds and lawns without herbicides and provides the added benefit of building the soil by adding organic matter to it. The main disadvantage of sheet mulching is that it can attract sow bugs and earwigs to the area. Sheet mulching is also sometimes called “sheet composting,” “layered gardening” or “lasagna gardening.” Essentially, it is composting on-site. It is a simple layering of slashed vegetation, cardboard or newspapers, and organic material, topped off with a nice layer of mulch. Over time, these layers decompose into rich, fertile soil. Sheet mulching mimics the natural way of building soil, which is from the top down. It also allows you to recycle old cardboard boxes, telephone books and newspapers. Here’s how to do it right. Because sheet mulching is a composting process, you need to provide appropriate amounts of both carbon and nitrogen. By alternating layers of cardboard, organic material and mulch, you provide the correct ratio that is needed. If you don’t add nitrogen sources when incorporating carbon-rich materials, such as sawdust, wood shavings and newspaper, into the soil, the carbon will temporarily deplete the soil of nitrogen, and it will be difficult to successfully grow anything in it. First, slash, or in the case of lawn, closely mow all existing herbaceous (soft-tissued, nonwoody) vegetation, and leave it in place. This will provide a layer of nitrogen-rich material. However, it is best to remove diseased or insect-infested plants from the area to avoid potential future problems. Next comes the carbon layer. Flatten some cardboard boxes, and lay them down, overlapping them by 6 inches. You can also use a one-quarter- to one-half-inch layer of newspapers, torn-up telephone books or old pieces of carpet. Then, soak everything with a hose. Water is a catalyst that will initiate the decomposition of the materials. Once everything is thoroughly soaked, try not to walk on it, or you may tear it. Next, it’s time to spread a 1-inch layer of well-aged manure or compost. Then, wet the area again. The layer of manure or compost will entice earthworms and other soil organisms up into the sheet mulch and hasten its decomposition. After you’ve added the compost, install your drip irrigation system in the area. Finally, top it all off with at least a 3-inch layer of mulch. Straw is a good choice because it is inexpensive, about $7 a bale. Just be sure that it is certified weed-free. For a front lawn, however, straw may not be an appropriate choice. In the front yard, finely chipped arborist’s wood chips would give a more finished and refined appearance. Arborist’s wood chips are made by running pruned tree limbs through a wood chipper. The best chips to use are 2 inches or less in size. They do not fly away in the wind, and give the landscape a forest-floor appearance. Arborist’s wood chips slowly decompose, adding valuable organic matter to the soil. These chips are not the same as bark mulch, which can be blown around by the wind and does not decompose well. Arborist wood chips are available from local arborists and tree care companies. After all of the layers are in place, and the drip irrigation has been checked, it’s time to install your low-water-use plants. Plants can be installed as soon as the sheet mulch is in place. To plant, just pull aside the mulch and organic material, cut an “X” into the bottom layer, dig your hole, and install your plant. Then, put the organic material and mulch back into place. If you are planting large trees or shrubs, be careful not to pile the compost and mulch against the trunk. Leave a shallow well around them. Turf conversions are becoming more popular as concerns about water cost and availability increase. Take a good look at your landscape, and see if there is some turf that you would like to convert to a different use. It may save you time and money in the long run. Check out the handy City of Bozeman guide below. There are several water saving incentive for home owners. I have participated in several and have enjoyed several refunds for my water saving efforts. This is a reprint of an article I wrote when I was the commercial horticulture program coordinator for the western area of University of Nevada Cooperative Extension. For more specific gardening and horticulture advice be sure to visit your local Cooperative Extension office. How to Help Your Plants Survive Summer's HeatIn the heat of the summer, there is nothing I like better than relaxing on the deck, drinking a mojito and admiring my garden. However, the long, hot days of summer can make the plants in our landscape look straggly and tired. With a little bit of care, you can revitalize them, enjoy the scenery and some of those mojitos.
The most common stress on our plants is desiccation, or drying out. The dry winds and heat may cause plants to sag and wilt. Spraying or misting the leaves with water will revive most plants. The water will cool the leaves and increase the plant’s efficiency at drawing water up from the soil. If you are going to use your garden hose, be sure to let the water run on the lawn until the water cools so that you’re not spraying hot water on already heat-stressed plants. After giving your plants their shower, check your irrigation system. Make sure your drippers, emitters and sprinklers are not clogged, and that there are no breaks in your lines. Pay close attention to your watering regime. Most plants in your landscape will benefit from less frequent, deeper watering. During the heat of summer, deeply water your plants about twice a week. Deeper soaking encourages deep root growth and allows plants to draw water from deeper in the soil. You also want to reduce the amount of water lost from evaporation. Many people are surprised to learn that water can be wicked up and out of the soil through evaporation. To reduce soil evaporation, cover your soil with an organic mulch, such as wood chips, compost or straw. Put down at least 3 inches of mulch, taking care to pull it back from the plant bases. The mulch will help keep the soil cool and moist, as well as suppress weed growth. Why is it that so many weeds seem to do just fine in the scorching heat, while our landscape plants struggle? You can try hand pulling weeds that aren’t too difficult to remove or abundant. You can also cut them to the ground and try smothering them with a thick layer of mulch. As a last resort, you can spot spray difficult or aggressive weeds with an appropriate herbicide. However, it is very important to use herbicides when temperatures are low and winds are still. Never spray an herbicide in the heat of the day or when it is windy. Herbicides will volatilize, meaning they will go directly from a liquid to gas, in the presence of heat and sunlight. When an herbicide is a gas, it is less likely to make direct contact with plants and more likely to be inhaled by you. Remember to always read and follow the label directions and wear appropriate protective clothing. These same precautions also apply to using insecticides. Spider mites flourish in hot, dry summer weather. We also often see aphids all season long on their favorite plants. Fortunately, it is not necessary to spray insecticides to control spider mites or aphids, as both are easily controlled with water. Simply spraying infested plants with water will remove many of the insects and raise the humidity, thus altering the habitat of the insects. Spraying with water also has the added benefit of cooling off your plants. If you have herbaceous (nonwoody) perennials that aphids seem to especially love, such as milkweed and columbine, you can install a few micro-jet sprayers directed at the plants to discourage pests. Remember, insecticides are nonselective. They will kill all insects, even the beneficial ones. You want a robust population of beneficial insects in your garden for natural pest control, so use insecticides only as a last resort. Deadheading, or removing dry, spent flowers, will instantly make your plants look better. For most flowering plants, you can cut low on the stem, or to the nearest bud. This will encourage a second bloom. Once you’ve deadheaded, weeded, sprayed off the insects, and improved your watering regime, you may be tempted to give your plants some fertilizer. Don’t. Fertilizing in the heat of the summer can stress plants by increasing the salt content of the soil, and encouraging rapid and unsustainable growth. Besides, most woody plants (trees and shrubs) don’t even need fertilizer. With regular applications of organic mulch, most perennials don’t need fertilizer either. What you can do during these hot summer months is notice where you have bare spots in your yard, and create a plan for filling them. For a quick fix, you can temporarily fill them with heat-tolerant annuals, such as cosmos, salvia, lobelia, or alyssum. Herbs such as basil, parsley, and borage also fill in nicely and provide tasty additions to meals. For a long-term solution, consider planting some ornamental grasses when the weather cools down a bit. Ornamental grasses are especially nice because they increase the biodiversity of your garden, typically use less water, and are interesting to look at year-round. Taller varieties can also be used to shade more heat-sensitive perennials. Providing good cultural care, such as proper planting, pruning, mulching and watering, is the best way to help your plants survive summers hot spells. Also, choosing plants that are native, drought-tolerant or adapted to southwestern Montana will reduce maintenance and water requirements. This is a reprint of an article I wrote when I was the commercial horticulture program coordinator for the western area of University of Nevada Cooperative Extension. |
Special EventsRecord your WOD on Beyond the Whiteboard.
Do you need CrossFit or yoga gear? Click on the links below to buy through our GORUCK, Reebok, Rogue or Affiliate share sale programs. These are affiliate links and our gym will be compensated if you make a purchase after clicking on these links.

 Check out our Flickr page!
Categories
All
Archives
April 2024
|
True Spirit CrossFit
 RSS Feed
|

|