|
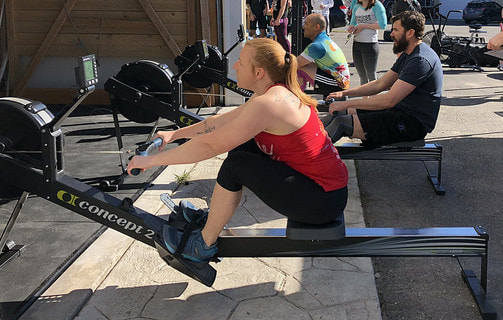
Joaquin, James and Red Feather row hard during our April Festivus Games. Homegrown Paleo - Compost HappensI love it when people seek my advice on how to establish a landscape or garden. It gives me the opportunity to help at the ground level and advise them on proper soil preparation. My advice? Add compost.
Technically speaking, composting is a process that results in a product called humus. This happens through the microbial decomposition of organic material into a nutrient-rich and fertile soil amendment. Not only does compost provide innumerable benefits to your plants and landscape, it’s also free to make and reduces the amount of green waste sent to the local landfill. Many people have the misconception that composting is messy, smelly and attracts vermin. This is not true. When done correctly, composting is easy and results in vigorous plants and bountiful garden crops. It is probably the most valuable thing you can do for your yard. The basic compost recipe is equal parts of green material and brown material, plus a little soil, water and air. Green material includes fresh organic waste, such as grass clippings, deadheaded flowers and kitchen scraps. Brown material is dried or dead organic waste, such as fallen leaves, dried grass, pruned wood, shredded newspaper or cardboard. Never add meat scraps, pet waste, weeds with seeds, or diseased materials to your compost pile. All materials you add should be less than 2 inches in size so that it will break down quickly. Select a location for your compost pile that is tucked away somewhere in your yard, or simply build it where you eventually want to build your garden. Make sure the area you select gets about six hours of sunlight each day. You can heap all of the material together in a loose pile, construct a simple bin, or purchase a commercially made compost bin. Once you have found a place for your composting venture, it’s time to pile up your green and brown materials. It should be at least 3 feet to 4 feet square. About every foot, add an inch or two of soil, which will supply microbes to decompose the organic matter. Add water as you go. The microbes need water and air in order to get to work, so keep the compost pile wet, but not soggy. It should be about as damp as a wrung-out sponge. If it is too wet, the process will switch from aerobic to anaerobic decomposition, and the pile WILL smell. Air is the final ingredient and is added to the recipe by turning your pile. Let the pile sit for about two days and then check the temperature. You can poke your hand into the middle of the pile, or use a thermometer. Once the internal temperature is about 160 F, it is time to turn it. This will aerate the pile, but decrease the temperature. Continue to monitor the heat, and turn the pile again when it reaches 160 F. If you continue turning the pile every time it heats back up to 160 F, you should have usable humus in about two or three weeks. It is important to not add any new materials if you are actively turning your pile. Alternatively, you can just leave the pile sit, and not turn it. The composting will still take place, but much more passively. It will take more time – sometime up to a year – but will not require as much effort by you. Either way, you will enjoy seeing your plants thrive as your compost does its magic in your soil. This is a reprint of an article I wrote when I was the commercial horticulture program coordinator for the western area of University of Nevada Cooperative Extension. For more specific gardening and horticulture advice be sure to visit your local Cooperative Extension office.
0 Comments
Leave a Reply. |
Special EventsRecord your WOD on Beyond the Whiteboard.
Do you need CrossFit or yoga gear? Click on the links below to buy through our GORUCK, Reebok, Rogue or Affiliate share sale programs. These are affiliate links and our gym will be compensated if you make a purchase after clicking on these links.
Check out our Flickr page!
Categories
All
Archives
March 2024
|
True Spirit CrossFit
|


 RSS Feed

